
本文将介绍在 Google Cloud 中,如何将标准的 CentOS 镜像导入 Google Cloud 的 Compute Engine 的 image 中。
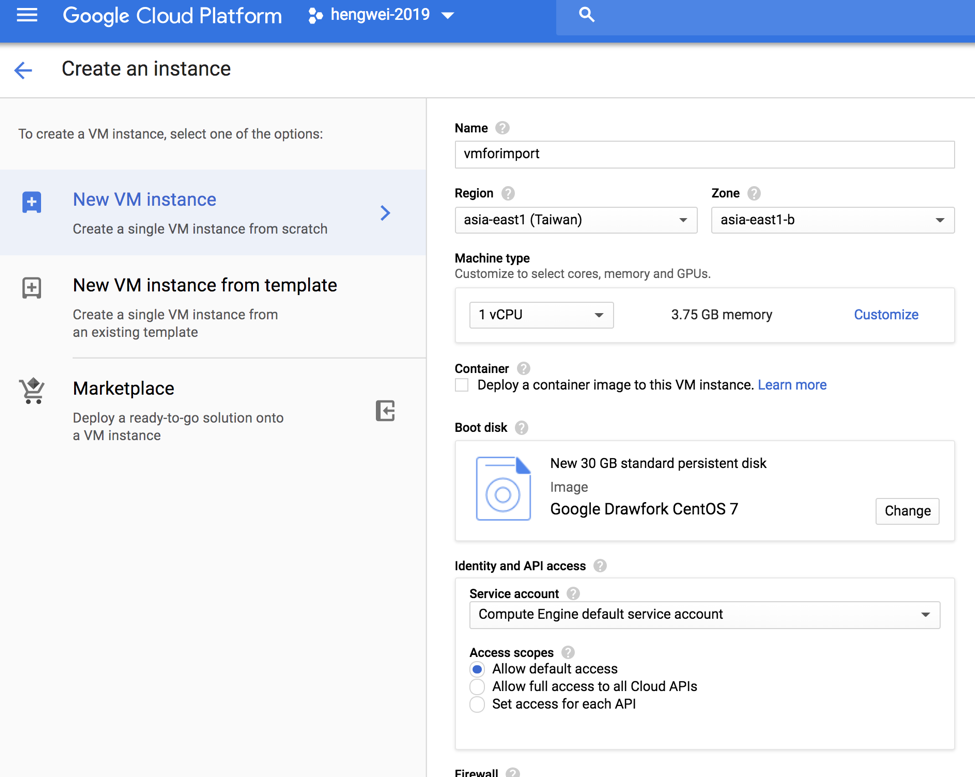
一 创建导入镜像的 VM
创建一台 CerntOS7 的 VM:
二 下载 qcow2 镜像
我们一般在以下站点下载标准 CentOS 镜像:
https://cloud.centos.org/centos/7/images/
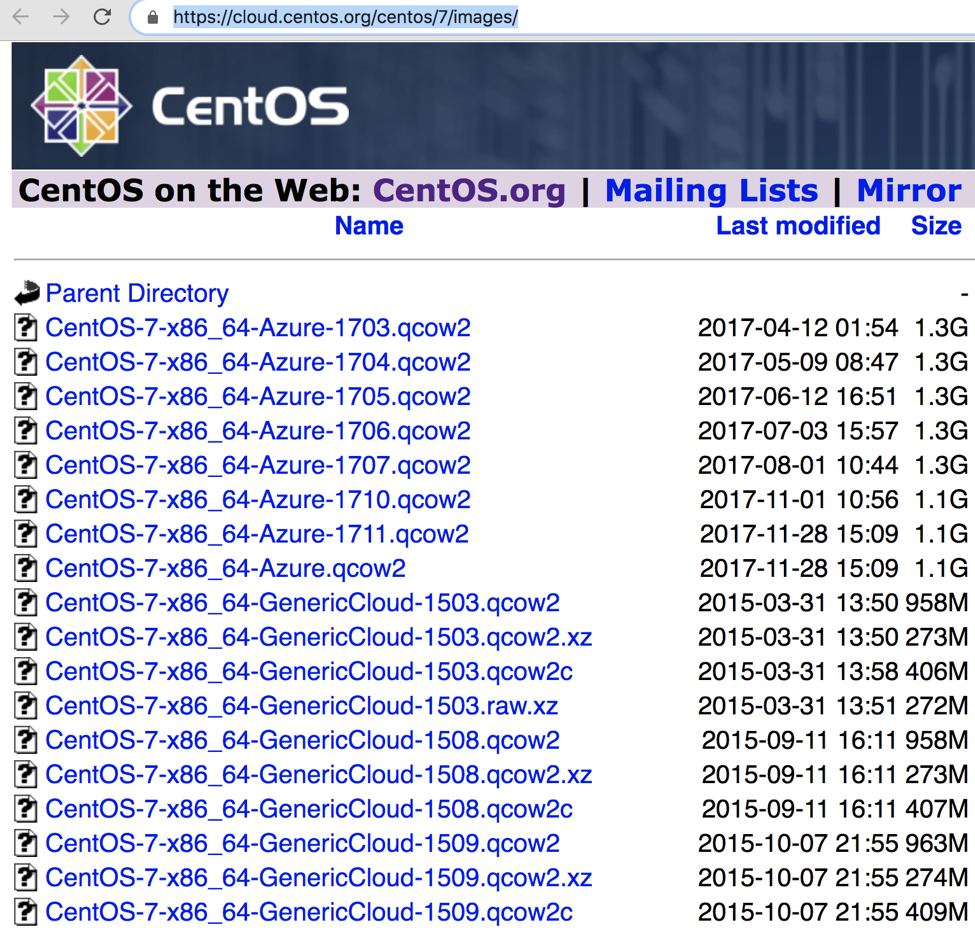
登录刚刚创建的 VM,下载相应的镜像:
wget https://cloud.centos.org/centos/7/images/CentOS-7-x86_64-GenericCloud.qcow2
三 更改镜像 root 密码
通过 virt-customize 可以更改 qcow2 镜像的密码。这里要先安装相关的包:
yum install -y virt-customize yum install libguestfs-tools yum install qemu-kvm libvirt libvirt-python libguestfs-tools virt-install -y systemctl start libvirtd export LIBGUESTFS_BACKEND=direct chmod 777 CentOS-7-x86_64-GenericCloud.qcow2
更改 root 密码:
virt-customize -a ./CentOS-7-x86_64-GenericCloud.qcow2 --root-password password:redhat

此时,此镜像的 root password 为 redhat
四 上传 disk 文件到 Google Storage
将 qcow2 的镜像转换为 raw 格式,且名称改为 disk.raw:
qemu-img convert ./CentOS-7-x86_64-GenericCloud.qcow2 disk.raw
将 disk.raw 压缩:
- tar -czSf disk.raw.tar.gz disk.raw
在 Google Cloud Storage 上创建一个 bucket:
- gsutil mb gs://hwimport
对 storage 操作需要添加相应的权限:
- 我采用 gcloud auth login 的方式更改登录用户。
上传磁盘压缩文件到 Google Cloud Storage:
- gsutil cp ./disk.raw.tar.gz gs://hwimport
五 从 disk 文件创建 Compute Engine 的 image
创建 image,采用 gcloud 命令:
gcloud compute images create hwcentos7 --source-uri gs://hwimport/disk.raw.tar.gz
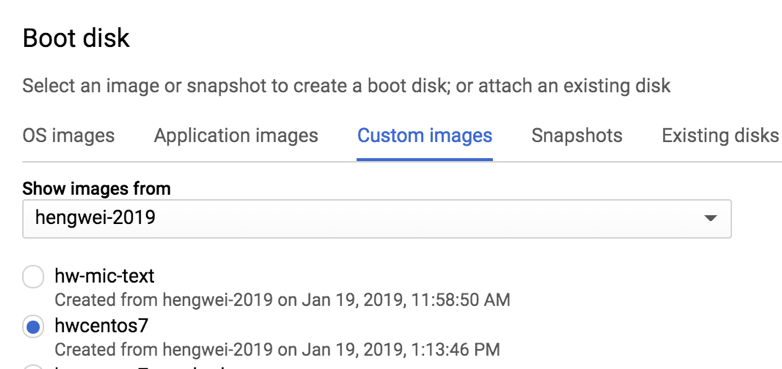
六 由 image 创建 VM
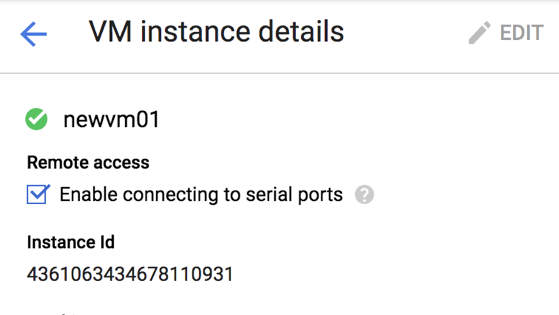
七 从串口登录 VM,添加相应的用户和登录信息
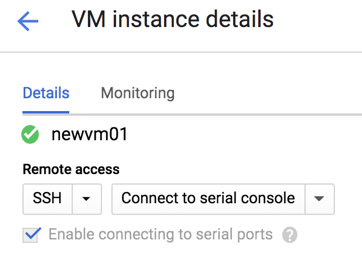
编辑 VM,开启串口连接的功能:
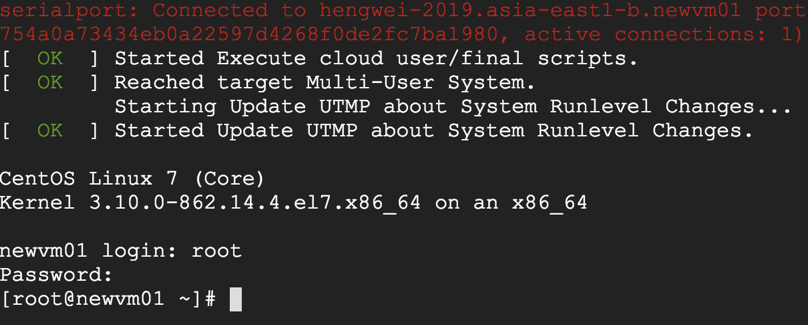
从串口连接入 VM:
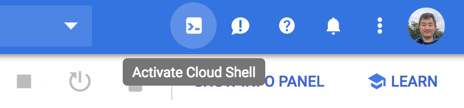
打开 cloud shell,点击右上角的 cloud shell 标签:
中 cloud shell 中,进入.ssh 目录。查看 google_compute_engine.pub 文件:

将其内容复制到 newvm01 的 /home/hengwei/.ssh/authorized_key 文件中。
八 用 public key 登录 VM
在 cloud shell 中,登录 newvm01:
gcloud compute ssh newvm01

登录成功。
cloud shell 中~/.ssh/google_compute_engine 文件中的私钥复制到本地,用这个私钥进行登录:
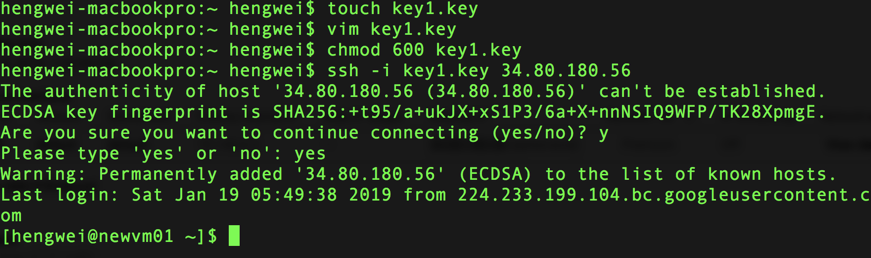
登录成功。
文章版权归作者所有,未经许可不得转载。
评论