摘要:现在越来越多的技术架构下会组合使用MaxCompute和TableStore,用MaxCompute作大数据分析,计算的结果会导出到TableStore提供在线访问。MaxCompute提供海量数据计算的能力,而TableStore提供海量数据高并发低延迟读写的能力。
概述
现在越来越多的技术架构下会组合使用 MaxCompute 和 TableStore,用 MaxCompute 作大数据分析,计算的结果会导出到 TableStore 提供在线访问。MaxCompute 提供海量数据计算的能力,而 TableStore 提供海量数据高并发低延迟读写的能力。
将 MaxCompute内数据导出至 TableStore,目前可选的几种主要途径包括:
自己编写工具:使用 MaxCompute SDK 通过 Tunnel 读取表数据,再通过 TableStore SDK 再写入数据。
DataX:自己在服务器上托管执行 DataX 任务。
使用数据集成服务:其系统底层也是 DataX,额外提供了服务化以及分布式的能力。
其中第二种是我们最常推荐给用户做临时的数据导出使用的,如果没有需要对数据做特殊处理的需求,我们一般不推荐第一种途径。
DataX 在阿里集团内部已经应用了很多年,经历了多次双十一的考验,是一个稳定、易用、高效的工具。随着 MaxCompute 上结果数据越来越庞大,数据导出的速率越来越被看重,海量的数据需要在基线内完成导出。本篇文章,主要会介绍几种优化手段,以提高使用 DataX 来进行 MaxCompute 向 TableStore 数据导出的吞吐量。
优化过程
我们会以实际的场景,来演示如何通过一步步的优化,提升数据导出的速度。在数据导出的整个链路上,主要有三个环节,一是 MaxCompute 数据通道的读,二是 DataX 的数据交换,三是 TableStore 的在线写,这三个环节任意一个成为瓶颈,都会影响导出的速度。
MaxCompute 数据通道的读的性能比较高,一般不会成为瓶颈,本文主要是针对后两个环节来优化。优化的核心指导方针就是:1. 提高并发,2. 降低写入延迟。接下来列举的几种优化手段,也是围绕这两点,来不断进行优化。
实验选择使用 TableStore 的测试环境,在 MaxCompute 上,我们会创建一张表并准备 1 亿行数据。TableStore 的测试环境规模以及 DataX Job 宿主机的规格都较小,所以整个实验最终达到的速率是比较小的,主要为了演示速率如何提升。而在真实的 TableStore 生产环境上,规模足够的情况下,我们帮助过应用优化到每秒上百 M 甚至上 G 的速度,优化手段相同。
数据准备
首先在 MaxCompute 内创建如下表:
md5 string, userid string, name string, comments string, attr0 string, attr1 string, attr2 string, attr3 string, create_time string, udpate_time string);
复制代码
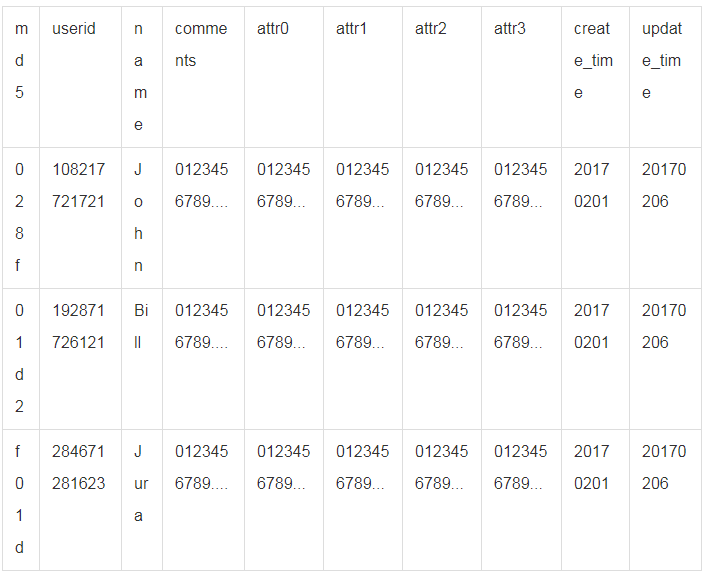
其次在表内倒入 1 亿行数据,每行数据约 200 个字节,其中 userid 列采用随机值,计算出的 md5 值取 4 个字节作为 md5 列,数据样例如下:
测试数据导入使用的是 MaxCompute Tunnel,速度还是比较可观的。
数据准备完毕后,在 TableStore 上创建一张表,使用 md5 和 userid 作为主键列:
  TableMeta tableMeta = new TableMeta("DataTable");  tableMeta.addPrimaryKeyColumn("md5", PrimaryKeyType.STRING);  tableMeta.addPrimaryKeyColumn("userid", PrimaryKeyType.STRING);
  CapacityUnit capacityUnit = new CapacityUnit(0, 0);
  CreateTableRequest request = new CreateTableRequest();  request.setTableMeta(tableMeta);  request.setReservedThroughput(capacityUnit);
  ots.createTable(request);
复制代码
表和数据均准备完毕后,使用如下 DataX Job 配置类进行一次数据导出:
"job": { "setting": { "speed": { "channel": "1" } }, "content": [ { "reader": { "name": "odpsreader", "parameter": { "accessId": "accessid", "accessKey": "accesskey", "project": "aliyun_ots_dev", "table": "data_for_ots", "partition": [], "column": ["md5","userid","name","comments","attr0","attr1","attr2","attr3","create_time","udpate_time"], "packageAuthorizedProject": "", "splitMode": "record", "odpsServer": "****", "tunnelServer": "****" } }, "writer": { "name": "otswriter", "parameter": { "endpoint":"http://data-import-test.cn-hangzhou.ots.aliyuncs.com", "accessId":"accessid", "accessKey":"accesskey", "instanceName":"data-import-test", "table":"DataTable", "primaryKey":[ {"name":"md5", "type":"string"}, {"name":"userid", "type":"string"} ], "column":[ {"name":"name","type":"string"}, {"name":"comments","type":"string"}, {"name":"attr0","type":"string"}, {"name":"attr1","type":"string"}, {"name":"attr2","type":"string"}, {"name":"attr3","type":"string"}, {"name":"create_time","type":"string"}, {"name":"update_time","type":"string"} ], "writeMode":"UpdateRow" } } } ] }}
复制代码
启动 DataX 任务,从标准输出中可以看到当前数据导出的速度:
2017-02-07 08:41:49.285 [job-0] INFO StandAloneJobContainerCommunicator - Total 271520 records, 55194052 bytes | Speed 1.05MB/s, 5404 records/s | Error 0 records, 0 bytes | All Task WaitWriterTime 4.501s | All Task WaitReaderTime 47.815s | Percentage 0.00%2017-02-07 08:41:59.286 [job-0] INFO StandAloneJobContainerCommunicator - Total 324640 records, 65992457 bytes | Speed 1.03MB/s, 5312 records/s | Error 0 records, 0 bytes | All Task WaitWriterTime 5.474s | All Task WaitReaderTime 55.068s | Percentage 0.00%2017-02-07 08:42:09.288 [job-0] INFO StandAloneJobContainerCommunicator - Total 377600 records, 76758462 bytes | Speed 1.03MB/s, 5296 records/s | Error 0 records, 0 bytes | All Task WaitWriterTime 6.479s | All Task WaitReaderTime 62.297s | Percentage 0.00%2017-02-07 08:42:19.289 [job-0] INFO StandAloneJobContainerCommunicator - Total 431072 records, 87628377 bytes | Speed 1.04MB/s, 5347 records/s | Error 0 records, 0 bytes | All Task WaitWriterTime 7.469s | All Task WaitReaderTime 69.559s | Percentage 0.00%2017-02-07 08:42:29.290 [job-0] INFO StandAloneJobContainerCommunicator - Total 484672 records, 98524462 bytes | Speed 1.04MB/s, 5360 records/s | Error 0 records, 0 bytes | All Task WaitWriterTime 8.421s | All Task WaitReaderTime 76.892s | Percentage 0.00%2017-02-07 08:42:39.292 [job-0] INFO StandAloneJobContainerCommunicator - Total 538144 records, 109394175 bytes | Speed 1.04MB/s, 5347 records/s | Error 0 records, 0 bytes | All Task WaitWriterTime 9.428s | All Task WaitReaderTime 83.889s | Percentage 0.00%
复制代码
可以看到,当前的速度大约是 1MB/s,接下来会演示如何进行优化,一步一步将速度给提升上去。
一:配置合理的 DataX 基础参数
第一步是对 DataX 的几个基础参数进行调优,先大致了解下一个 DataX Job 内部,任务的运行结构:
一个 DataX Job 会切分成多个 Task,每个 Task 会按 TaskGroup 进行分组,一个 Task 内部会有一组 Reader->Channel->Writer。Channel 是连接 Reader 和 Writer 的数据交换通道,所有的数据都会经由 Channel 进行传输。
在 DataX 内部对每个 Channel 会有严格的速度控制,默认的速度限制是 1MB/s,这也是为何我们使用默认配置,速度为 1MB/s 的原因。所以第一个需要优化的基础参数就是单个 Channel 的速度限制,更改配置如下:
"core": { "transport": { "channel": { "speed": { "byte": 5242880 } } } }, "job": { ... }}
复制代码
我们把单个 Channel 的速度上限配置为 5MB。这个值需要针对不同的场景进行不同的配置,例如对于 MaxCompute,单个 Channel 的速度可以达到几十 MB,对于 TableStore,在列较小较多的场景下,单个 Channel 的速度是几 MB,而在列较大的场景下,可能速度就会上到几十 MB。
我们当前默认配置中配置启动的 Job 内 Channel 数为 1,要提高速度,并发必须提高,这个是第二步要做的优化。但是在做第二个优化之前,还需要调整一个基础参数,那就是 DataX Job 启动的 JVM 的内存大小配置。
目前 DataX 启动的 JVM 默认的配置是"-Xms1g -Xmx1g",当一个 Job 内 Channel 数变多后,内存的占用会显著增加,因为 DataX 作为数据交换通道,在内存中会缓存较多的数据,例如 Channel 中会有一个 Buffer,作为临时的数据交换的缓冲区,而在部分 Reader 和 Writer 的中,也会存在一些 Buffer。
调整 JVM 参数的方式有两种,一种是直接更改datax.py,另一种是在启动的时候,加上对应的参数,如下:
python datax/bin/datax.py --jvm="-Xms8G -Xmx8G" ots.json
复制代码
通常我们建议将内存设置为 4G 或者 8G,这个也可以根据实际情况来调整。
在优化完单 Channel 的限速和 JVM 的内存参数之后,我们重新跑一下任务:
2017-02-07 08:44:53.188 [job-0] INFO StandAloneJobContainerCommunicator - Total 153920 records, 31289079 bytes | Speed 1.67MB/s, 8608 records/s | Error 0 records, 0 bytes | All Task WaitWriterTime 2.873s | All Task WaitReaderTime 12.098s | Percentage 0.00%2017-02-07 08:45:03.189 [job-0] INFO StandAloneJobContainerCommunicator - Total 256064 records, 52051995 bytes | Speed 1.98MB/s, 10214 records/s | Error 0 records, 0 bytes | All Task WaitWriterTime 4.892s | All Task WaitReaderTime 17.194s | Percentage 0.00%2017-02-07 08:45:13.191 [job-0] INFO StandAloneJobContainerCommunicator - Total 360864 records, 73356370 bytes | Speed 2.03MB/s, 10480 records/s | Error 0 records, 0 bytes | All Task WaitWriterTime 9.221s | All Task WaitReaderTime 19.192s | Percentage 0.00%2017-02-07 08:45:23.192 [job-0] INFO StandAloneJobContainerCommunicator - Total 464384 records, 94400221 bytes | Speed 2.01MB/s, 10352 records/s | Error 0 records, 0 bytes | All Task WaitWriterTime 11.754s | All Task WaitReaderTime 22.278s | Percentage 0.00%2017-02-07 08:45:33.194 [job-0] INFO StandAloneJobContainerCommunicator - Total 570176 records, 115905214 bytes | Speed 2.05MB/s, 10579 records/s | Error 0 records, 0 bytes | All Task WaitWriterTime 14.827s | All Task WaitReaderTime 25.367s | Percentage 0.00%2017-02-07 08:45:43.195 [job-0] INFO StandAloneJobContainerCommunicator - Total 675328 records, 137281049 bytes | Speed 2.04MB/s, 10515 records/s | Error 0 records, 0 bytes | All Task WaitWriterTime 18.515s | All Task WaitReaderTime 27.810s | Percentage 0.00%2017-02-07 08:45:53.197 [job-0] INFO StandAloneJobContainerCommunicator - Total 778752 records, 158304152 bytes | Speed 2.00MB/s, 10342 records/s | Error 0 records, 0 bytes | All Task WaitWriterTime 20.403s | All Task WaitReaderTime 32.418s | Percentage 0.00%
复制代码
当前数据导出的速度已经从 1MB 提升到 2MB。
二:提升 DataX Job 内 Channel 并发
在上一点中指出,当前 Job 内部,只有单个 Channel 在执行导出任务,而要提升速率,要做的就是提升 Channel 的并发数。
DataX 内部对每个 Channel 会做限速,可以限制每秒 byte 数,也可以限制每秒 record 数。除了对每个 Channel 限速,在全局还会有一个速度限制的配置,默认是不限。
提升 Channel 并发数有三种途径:
1, 配置全局 Byte 限速以及单 Channel Byte 限速,Channel 个数 = 全局 Byte 限速 / 单 Channel Byte 限速。(下面示例中最终 Channel 个数为 10)
"core": { "transport": { "channel": { "speed": { "byte": 1048576 } } } }, "job": { "setting": { "speed": { "byte" : 10485760 } }, ... }}
复制代码
2,配置全局 Record 限速以及单 Channel Record 限速,Channel 个数 = 全局 Record 限速 / 单 Channel Record 限速。(下面示例中最终 Channel 个数为 3)
"core": { "transport": { "channel": { "speed": { "record": 100 } } } }, "job": { "setting": { "speed": { "record" : 300 } }, ... }}
复制代码
3, 全局不限速,直接配置 Channel 个数。(下面示例中最终 Channel 个数为 5)
"core": { "transport": { "channel": { "speed": { "byte": 1048576 } } } }, "job": { "setting": { "speed": { "channel" : 5 } }, ... }}
复制代码
第三种方式最简单直接,但是这样就缺少了全局的限速。在选择 Channel 个数时,同样需要注意,Channel 个数并不是越多越好。Channel 个数的增加,带来的是更多的 CPU 消耗以及内存消耗。如果 Channel 并发配置过高导致 JVM 内存不够用,会出现的情况是发生频繁的 Full GC,导出速度会骤降,适得其反。
可以在 DataX 的输出日志中,找到本次任务的 Channel 的数:
2017-02-07 13:27:45.016 [job-0] INFO JobContainer - DataX Reader.Job [odpsreader] splits to [15] tasks.2017-02-07 13:27:45.017 [job-0] INFO OtsWriterMasterProxy - Begin split and MandatoryNumber : 152017-02-07 13:27:45.025 [job-0] INFO OtsWriterMasterProxy - End split.2017-02-07 13:27:45.025 [job-0] INFO JobContainer - DataX Writer.Job [otswriter] splits to [15] tasks.
复制代码
在我们这次实验中,我们把 Channel 数直接配置为 10,再进行一次导出:
2017-02-07 08:58:24.366 [job-0] INFO StandAloneJobContainerCommunicator - Total 2465984 records, 501286700 bytes | Speed 9.19MB/s, 47414 records/s | Error 0 records, 0 bytes | All Task WaitWriterTime 362.875s | All Task WaitReaderTime 378.978s | Percentage 0.00%2017-02-07 08:58:34.368 [job-0] INFO StandAloneJobContainerCommunicator - Total 2941792 records, 598009404 bytes | Speed 9.22MB/s, 47580 records/s | Error 0 records, 0 bytes | All Task WaitWriterTime 459.910s | All Task WaitReaderTime 379.002s | Percentage 0.00%2017-02-07 08:58:44.369 [job-0] INFO StandAloneJobContainerCommunicator - Total 3436064 records, 698484741 bytes | Speed 9.58MB/s, 49427 records/s | Error 0 records, 0 bytes | All Task WaitWriterTime 556.324s | All Task WaitReaderTime 379.026s | Percentage 0.00%2017-02-07 08:58:54.371 [job-0] INFO StandAloneJobContainerCommunicator - Total 3905856 records, 793982836 bytes | Speed 9.11MB/s, 46979 records/s | Error 0 records, 0 bytes | All Task WaitWriterTime 652.749s | All Task WaitReaderTime 379.050s | Percentage 0.00%2017-02-07 08:59:04.372 [job-0] INFO StandAloneJobContainerCommunicator - Total 4384512 records, 891284760 bytes | Speed 9.28MB/s, 47865 records/s | Error 0 records, 0 bytes | All Task WaitWriterTime 749.464s | All Task WaitReaderTime 379.074s | Percentage 0.00%2017-02-07 08:59:14.373 [job-0] INFO StandAloneJobContainerCommunicator - Total 4875136 records, 991017582 bytes | Speed 9.51MB/s, 49062 records/s | Error 0 records, 0 bytes | All Task WaitWriterTime 846.522s | All Task WaitReaderTime 379.098s | Percentage 0.00%
复制代码
可以看到在 Channel 数从 1 提升到 10 之后,速度从 2MB/s 提升到了 9MB/s。此时若再提高 Channel 数到 15,速度已经不见涨,而从服务端监控看,每批次导入的写入延迟确在涨,说明当前瓶颈在 TableStore 写入端。
三:对 TableStore 表进行预分区,并进一步提升 DataX Channel 并发
在上面几个优化做完后,DataX 数据交换这一环节已经不是瓶颈,当前瓶颈在 TableStore 端的写入能力上。TableStore 是分布式的存储,一张大表会被切分成很多的分区,分区会分散到后端的各个物理机上提供服务。一张新创建的表,默认分区数为 1,当这张表越来越大,TableStore 会将其分裂,此时分裂是自动完成的。分区的个数,一定程度上与能提供的服务能力相关。某些业务场景,新建表后,就需要对表进行大规模的数据导入,此时默认的单个分区肯定是不够用的,当然可以等数据量慢慢涨上来后等表自动分裂,但是这个周期会比较长。此时,我们推荐的做法是在创建表的时候进行预分区。
不过目前我们还没有对外开放通过 SDK 来进行预分区的功能,所以如果需要对表进行预分区,可以先通过工单来联系我们帮助进行预分区。
我们新建一张表,并将表预分 4 个分区,partition key 为 md5 列,采用 md5 列的主要原因是在其上数据的分区基本是均匀的。如果数据在 partition key 分布不均匀,则即使做了预分区,导入性能也不会得到明显的提升。以相同的 Job 配置,再跑一下导出任务:
2017-02-08 13:48:18.692 [job-0] INFO StandAloneJobContainerCommunicator - Total 11395424 records, 2316456451 bytes | Speed 18.79MB/s, 96940 records/s | Error 0 records, 0 bytes | All Task WaitWriterTime 666.003s | All Task WaitReaderTime 336.048s | Percentage 0.00%2017-02-08 13:48:28.693 [job-0] INFO StandAloneJobContainerCommunicator - Total 12340192 records, 2508508780 bytes | Speed 18.32MB/s, 94476 records/s | Error 0 records, 0 bytes | All Task WaitWriterTime 716.743s | All Task WaitReaderTime 349.424s | Percentage 0.00%2017-02-08 13:48:38.694 [job-0] INFO StandAloneJobContainerCommunicator - Total 13197472 records, 2682776109 bytes | Speed 16.62MB/s, 85728 records/s | Error 0 records, 0 bytes | All Task WaitWriterTime 776.487s | All Task WaitReaderTime 359.132s | Percentage 0.00%2017-02-08 13:48:48.695 [job-0] INFO StandAloneJobContainerCommunicator - Total 14085856 records, 2863367678 bytes | Speed 17.22MB/s, 88838 records/s | Error 0 records, 0 bytes | All Task WaitWriterTime 826.191s | All Task WaitReaderTime 378.034s | Percentage 0.00%2017-02-08 13:48:58.696 [job-0] INFO StandAloneJobContainerCommunicator - Total 15063328 records, 3062065378 bytes | Speed 18.95MB/s, 97747 records/s | Error 0 records, 0 bytes | All Task WaitWriterTime 867.363s | All Task WaitReaderTime 401.640s | Percentage 0.00%2017-02-08 13:49:08.697 [job-0] INFO StandAloneJobContainerCommunicator - Total 15908736 records, 3233917750 bytes | Speed 16.39MB/s, 84540 records/s | Error 0 records, 0 bytes | All Task WaitWriterTime 921.193s | All Task WaitReaderTime 418.862s | Percentage 0.00%
复制代码
此时速度从 9MB/s 提升到 18MB/s 左右,在 TableStore 服务端能够提高更多的服务能力后,我们尝试再将 Channel 的并发从 10 提高到 15:
2017-02-08 13:51:54.546 [job-0] INFO StandAloneJobContainerCommunicator - Total 8194848 records, 1665844036 bytes | Speed 20.97MB/s, 108160 records/s | Error 0 records, 0 bytes | All Task WaitWriterTime 884.016s | All Task WaitReaderTime 263.742s | Percentage 0.00%2017-02-08 13:52:04.547 [job-0] INFO StandAloneJobContainerCommunicator - Total 9351040 records, 1900875263 bytes | Speed 22.41MB/s, 115619 records/s | Error 0 records, 0 bytes | All Task WaitWriterTime 1,007.206s | All Task WaitReaderTime 263.789s | Percentage 0.00%2017-02-08 13:52:14.548 [job-0] INFO StandAloneJobContainerCommunicator - Total 10460064 records, 2126318844 bytes | Speed 21.50MB/s, 110902 records/s | Error 0 records, 0 bytes | All Task WaitWriterTime 1,140.113s | All Task WaitReaderTime 263.824s | Percentage 0.00%2017-02-08 13:52:24.549 [job-0] INFO StandAloneJobContainerCommunicator - Total 11662112 records, 2370669233 bytes | Speed 23.30MB/s, 120204 records/s | Error 0 records, 0 bytes | All Task WaitWriterTime 1,269.070s | All Task WaitReaderTime 263.863s | Percentage 0.00%2017-02-08 13:52:34.550 [job-0] INFO StandAloneJobContainerCommunicator - Total 12874240 records, 2617069638 bytes | Speed 23.50MB/s, 121212 records/s | Error 0 records, 0 bytes | All Task WaitWriterTime 1,396.991s | All Task WaitReaderTime 263.913s | Percentage 0.00%
复制代码
此时速度又进一步提升,从 18MB/s 提升到 22MB/s 左右。
四:提高每次批量写行数
我们构建的场景,每行大约是 200 字节左右大小。DataX 的 OTSWriter 写入插件底层是使用的 TableStore SDK 提供的 BatchWrite 接口进行数据写入,默认一次请求写入 100 行数据,也就是说一次请求只会导入约 20KB 大小的数据。每次写过来的数据包都比较小,非常的不经济。
当前 TableStore 的 BatchWrite 的限制比较不灵活,会限制行数和数据大小,其中行数默认上限是 200 行。在每行都比较小的场景下,200 行一次批量写入是非常不经济的,在我们的这次实验中,我们将上限改为 1000 行,并将 DataX TableStore 写入插件内部一次批量写入的行数也改为 1000 行,来验证将每次写入的包变大后,对写入效率的提升。任务配置更改如下(配置项为 job.content.writer.parameter.batchWriteCount):
"job": { "content": [ { "reader": { ... }, "writer": { "name": "otswriter", "parameter": { "batchWriteCount":1000, ... } } } ] }}
复制代码
再次执行任务,速度如下:
2017-02-08 13:55:16.924 [job-0] INFO StandAloneJobContainerCommunicator - Total 11413216 records, 2320073926 bytes | Speed 29.44MB/s, 151849 records/s | Error 0 records, 0 bytes | All Task WaitWriterTime 72.662s | All Task WaitReaderTime 1,030.787s | Percentage 0.00%2017-02-08 13:55:36.925 [job-0] INFO StandAloneJobContainerCommunicator - Total 14462240 records, 2939879188 bytes | Speed 29.55MB/s, 152451 records/s | Error 0 records, 0 bytes | All Task WaitWriterTime 85.228s | All Task WaitReaderTime 1,297.655s | Percentage 0.00%2017-02-08 13:55:46.927 [job-0] INFO StandAloneJobContainerCommunicator - Total 15979552 records, 3248317815 bytes | Speed 29.41MB/s, 151731 records/s | Error 0 records, 0 bytes | All Task WaitWriterTime 89.841s | All Task WaitReaderTime 1,432.022s | Percentage 0.00%2017-02-08 13:55:56.928 [job-0] INFO StandAloneJobContainerCommunicator - Total 17488864 records, 3555129299 bytes | Speed 29.26MB/s, 150931 records/s | Error 0 records, 0 bytes | All Task WaitWriterTime 100.300s | All Task WaitReaderTime 1,558.120s | Percentage 0.00%2017-02-08 13:56:06.929 [job-0] INFO StandAloneJobContainerCommunicator - Total 19018240 records, 3866017412 bytes | Speed 29.65MB/s, 152937 records/s | Error 0 records, 0 bytes | All Task WaitWriterTime 106.391s | All Task WaitReaderTime 1,691.072s | Percentage 0.00%
复制代码
速度再次提升,从 22MB/s 提升到 29MB/s。TableStore 后续会优化对 BatchWrite 的行数限制,对于行比较小的场景采用一个比较友好的策略。
五:MaxCompute 表分区,提高 DataX Job 并发
以上优化策略都是在单个 DataX Job 的场景下进行的优化,单个 DataX Job 只能够运行在单台服务器上,没有办法分布式的执行。D2 上的托管服务器,一般是千兆网卡,也就是说最多提供 100MB/s 的速度。若想要进一步的速度提升,则必须采用多个 DataX Job 分布在多台服务器上执行才行。
DataX 内的 ODPSReader,可以通过配置一次导出整张表或者表的某个 Partition。我们可以利用 Partition,来将一张表拆分成多个 Job 分散导出,但是要求表必须是多分区的。
在我们的实验中,创建的 MaxCompute 表并不是多分区的,我们重新创建一张多分区的表:
md5 string, userid string, name string, comments string, attr0 string, attr1 string, attr2 string, attr3 string, create_time string, udpate_time string)PARTITIONED BY ( partid string)
复制代码
增加一列为 partid,作为分区,我们通过一个 SQL 将原表的数据导入到新表,并自动均匀的分散到 partid:
attr0, attr1, attr2, attr3, create_time, udpate_time, SUBSTR(md5, 1, 1) from data_for_ots;
复制代码
以上 SQL 会将 partid 的值取自 md5 列的第一个字符,md5 是一个十六进制的值,字符的取值范围是:0-f,这样我们就将原表切成了一个带 16 个分区的表。我们希望在每个分区内,数据都是均匀的,为了避免长尾,这也是为什么要设计一个 md5 列的原因。
在将一张表拆成多个分区后,我们就可以选择在不同的服务器上,为每个分区启动一个任务,配置如下(job.content.reader.parameter.partition):
"job": { "content": [ { "reader": { "name": "odpsreader", "parameter": { ... "partition": ["partid=0"], ... } }, "writer": { ... } } ] } }
复制代码
由于测试集群规模的原因,我们不演示多个 Job 并发后的速度提升。在 TableStore 服务端能力不是瓶颈的情况下,通过扩展 DataX Job 的并发,速度是能线性提升的。
本文作者:木洛
本文来源:阿里云云栖社区
来源链接:
https://yq.aliyun.com/articles/702318


评论